Add Drop Shadow effect in Paint.NET
1] Using Paint.NET Effects plugin
Launch Paint.NET and bring the mouse cursor to the “Effects” tab. Scroll down to “Objects” and from there, users will see the option that says “Drop Shadow.” Don’t click on it just yet, because first, we need to create an image to add our text to. To get started, click on the Layers tab, and then move the mouse cursor to Add New Layer, and click. After this is done, open the Tools menu and click on Text to type words on the image. These words can be anything, but we’ve chosen to go with the name of our website. Next, click Effects, Objects, and then Drop Shadow to begin the process of transforming the chosen words placed on the image. So far, one should be able to realize how easy this task is though it is not as powerful as using advanced image editing programs such as Photoshop or GIMP. Now, before we begin to drop the shadow, first the image editor must choose a color for the shadow. There’s an option called Shadow Color, so from there just choose the most fitting color and then move to the Offsets. Offset X moves the shadow to the left and right while Offset Y moves the shadow up and down. Users can widen the shadow with the Widening Radius, and change the opacity using Shadow Opacity. The whole thing is straightforward, but as we said before, it is not as advanced when compared to Photoshop. For basic drop shadow work, the Paint.NET Effect plug-in is a must have for any amateur image editor. It does exactly what it says it will do without any form of faults. To get a hold of the plug-in, visit the Paint.NET Effects home page and press the button that says Download now. Bear in mind that for this to work, users will be required to download Microsoft’s .NET Framework 2.0 or 3.5.
2] Using Drop Shadow plugin
Go to Softpedia.com and download, extract its contents to install the Drop Shadow plugin for Paimt.net. Move the extracted Drop Shadow folder to C:\Program Files\paint.net\Effects folder. Now, open Paint.net. Go to Layers on the menu bar. In the Layers, drop-down list select Add New Layer.
Click the Text tool on the left and type a text in the graphic edit area.
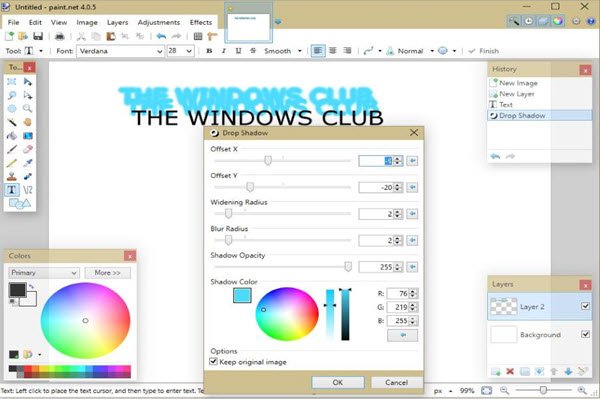
Then go to Effects on the menu bar. In the Effects drop-down list, hover the cursor over Object and click Drop Shadow.
A Drop Shadow dialog box will appear. Inside the dialog box, you can customize your Drop Shadow settings. Once you are done, click Ok.
You will see a text with a drop shadow effect in the editing area. Hope you find this post useful.